Hi everyone! I was cruising one of my groups on fb. A stitcher posted her wonderful work on a hand dyed fabric. My friend Sandie asked if she used the shaving cream method. Well, that got my curiosity going full steam! I found several tutorials and decided to try it for myself. So here goes and I am not a professional. Just passing on what I have learned.
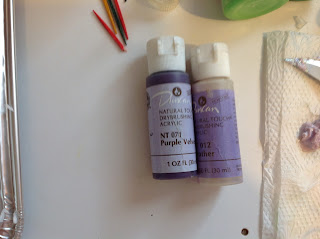
Cheaper shaving cream with no added colors. Old Tulip brand paints from my 80" sweat shirt days(eeeccckkk). Fabric scraps.
Aluminum cookie sheet with parchment paper. a piece of parchment paper for my counter top. tooth picks broken in half and a wooden ruler for scraping off the shaving cream.
Spray shaving cream in pan.
Kind of flatten the shaving cream with the wood ruler.
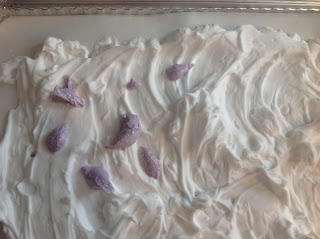
I used glitter lavender tulip brand paint first. Decided to test in just one corner of the pan. This way i didn't waste a lot of shaving cream if things were not going well.
Mixed around with a tooth pick.
Lay fabric flat. Pat down evenly. Takes about a minute to pat down.
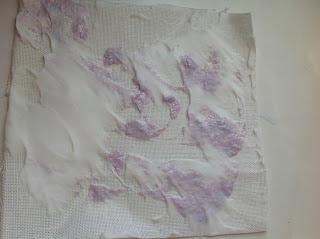
Pull up out of the shaving cream and lay flat on the counter top parchment paper.
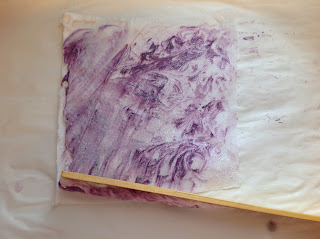
Used the wood ruler to scrape off the shaving cream and paint. Rinse off the ruler with water. Don't want to mix paint on the next piece of fabric.
I liked the effect of the glitter paint. But thought it was too suttle. Decided to add a darker purple,
After finding I didn't have any darker purple Tulip brand paint I decided to use my ceramic paint. It is color fast also.
I left the glitter paint in and added the purple.
Mixed around.
Was not happy with this result. I rinsed with water and lightened it up a bit.
This was the result.
I did not add more paint and mixed it around more.
I did find one thing. Scrape off the shaving cream, and paint, in the same direction of the paint flow. In this case the paint pattern is running from the bottom left/middle to the right/top. That is the way you want to scrape off the mixture. Be sure to rinse the cream mixture from your ruler, after each scraping, so it doesn't muddy up your fabric and affect the colors.
This was the result from mixing the paint around more.
This is the third time after patting down and pulling up fabric.
Last time and these were the 4 piece. All looking quite different.
Then i got brave! I used up the last of my glitter purple and added dark purple, and a little pink to the pan. I found out a drink straw works much better than a tooth pick and switched to that.
This was the result from my first full pan of paint mixing.
What the pan looked like after pulling up the first big piece of fabric.
Mixed in more pink.
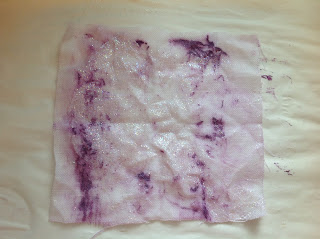
And this was the result.
I laid all fabric pieces on a towel to dry. I ironed on high, no steam, after the fabric pieces were dry.
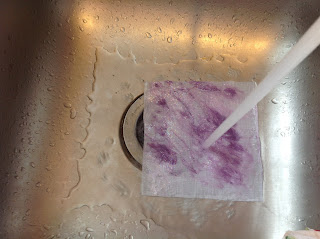
I rinsed with warm water. If the fabric was going to run I wanted to know now. Rather than find out after stitching. I was pleased that no color ran from the fabric.
The results of the day!
Cheaper shaving cream with no added colors. Old Tulip brand paints from my 80" sweat shirt days(eeeccckkk). Fabric scraps.
Aluminum cookie sheet with parchment paper. a piece of parchment paper for my counter top. tooth picks broken in half and a wooden ruler for scraping off the shaving cream.
Spray shaving cream in pan.
Kind of flatten the shaving cream with the wood ruler.
I used glitter lavender tulip brand paint first. Decided to test in just one corner of the pan. This way i didn't waste a lot of shaving cream if things were not going well.
Mixed around with a tooth pick.
Lay fabric flat. Pat down evenly. Takes about a minute to pat down.
Pull up out of the shaving cream and lay flat on the counter top parchment paper.
Used the wood ruler to scrape off the shaving cream and paint. Rinse off the ruler with water. Don't want to mix paint on the next piece of fabric.
I liked the effect of the glitter paint. But thought it was too suttle. Decided to add a darker purple,
After finding I didn't have any darker purple Tulip brand paint I decided to use my ceramic paint. It is color fast also.
I left the glitter paint in and added the purple.
Mixed around.
Was not happy with this result. I rinsed with water and lightened it up a bit.
This was the result.
I did not add more paint and mixed it around more.
I did find one thing. Scrape off the shaving cream, and paint, in the same direction of the paint flow. In this case the paint pattern is running from the bottom left/middle to the right/top. That is the way you want to scrape off the mixture. Be sure to rinse the cream mixture from your ruler, after each scraping, so it doesn't muddy up your fabric and affect the colors.
This was the result from mixing the paint around more.
This is the third time after patting down and pulling up fabric.
Last time and these were the 4 piece. All looking quite different.
Then i got brave! I used up the last of my glitter purple and added dark purple, and a little pink to the pan. I found out a drink straw works much better than a tooth pick and switched to that.
This was the result from my first full pan of paint mixing.
What the pan looked like after pulling up the first big piece of fabric.
Mixed in more pink.
And this was the result.
I rinsed with warm water. If the fabric was going to run I wanted to know now. Rather than find out after stitching. I was pleased that no color ran from the fabric.
The results of the day!
I have more stitchy new and will post that later, I wanted to get this posted while it was fresh in mind. Good luck!
Deb


